Week 9: Biryani Part 2.

This week, as I thought of what to cook, I had a quick chat with my aunt who, like my grandmother is an excellent cook.

I wrestled with the idea of trying out her crab curry (I’m scared of crabs) and then she suggested Prawn Biryani. My heart immediately lit up. I had forgotten about Prawn Biryani! Something so delicious. Something so Malabari.

The recipe she gave me is an extremely simple one to follow. However, cooking it is where the real challenge lies. You have to worry about overcooking the prawns, overcooking the rice, ensuring the flavours are strong enough to shine through the rice, etc.

Cooking it in class was fun. Once the rice and prawns got cooking together, the whole kitchen filled with a lovely aroma and in 3 seconds flat I had everyone surrounding my range, wanting to try it out.

Along with this, I cooked my grandmothers Tomato Pachadi. A yoghurt based dish with fried tomatoes. This turned out to be a lovely pink colour and was quite delicious too. I might have even learnt how to make tomato chutney in the process!

Initially, I wanted to serve Breadfruit chips. However, due to the unavailability of breadfruit, I quickly russled up a Cabbage Thoran (https://muzirismusings.wordpress.com/2014/06/15/week-1/)

For those who haven’t heard of breadfruit, its a fruit that looks a lot like a jackfruit or durian but is much smaller. The texture of the flesh is similar to that of bread. It’s almost always eaten raw  and is cooked in curries, thorans and as chips.

  1. Chemmeen Briyani (Prawn flavoured rice)

Rice – 500g

Prawns – 500g
Tomatoes – 300g
Onions – 200g
Ginger Garlic paste – 10g
Green chillies – 4
Cinnamon – 1 stick
Cloves – 4-5

Cardamom – 2 pods

Coriander leaves – small bunch
Mint leaves – small bunch

Turmeric Powder – 5g
Chilli Powder – 5g
Salt – 5g


Method:

  • Wash and soak the rice.
  • Clean and marinate the prawns in turmeric, salt and chilli powder for 30 minutes.
  • In a large pan, fry cinnamon, cloves, cardamom.
  • Add sliced onions, finely chopped tomatoes, green chillies.
  • Add in the prawns. Cook until it becomes a nice, thick paste.
  • Then add roughly chopped coriander and mint leaves.
  • Strain the liquid from the rice.
  • Stir in the rice.
  • Pour double the quantity of water to rice. Stir immediately and well. Season.


  1. Thakkali Pachadi (Tomato infused yoghurt)

Curd – 500ml

Tomatoes – 75g

Green Chillies – 2
Curry leaves – 5-6 leaves

Mustard Seeds – 5g
Urad Dal – 5g
Method:

  • Finely chop the tomatoes.
  • Heat oil, fry mustard seeds, urad dal and curry leaves.
  • Add in the finely chopped tomatoes. Fry well.
  • Mash it roughly.
  • Beat the curd well. Dilute with water if too thick.
  • Add a little salt.
  • Cool tomato mixture and then mix the two together.


Week 8: Summers in Kerala

For most of my school life, I spent my summer holidays in Kerala.

We would spend anywhere between 10 days to 2 months in the town of Thrissur. My brother and I wouldn’t have much to do during these holidays and so we usually spent our time driving our mother up the wall. We would fight, go on imaginary quests, read and re-read Harry Potter and the Goblet of Fire and watch endless amounts of TV. However, there were two activities I used to love. 1. Listening to my Grandfather’s stories in the dark when the power would go off,  and 2. Eating.

Quite often the two activities were combined and they used to make up for the whole trip.

Eating is a way of life in Kerala. Everyone waits for a break from whatever it is they are doing to get a cup of sweet milky tea and something fried. There is no concept of having breakfast like a king, lunch like a prince and dinner like a pauper. All three meals are for Kings, oh all the in-between meals as well!

When eating in Kerala, one must leave behind the mindset of not having anything spicy or oily for breakfast. Why not have something spicy and oily for breakfast? In fact, it might just be the best time to!

Coming back to summer vacations. Summer for most Indians means one thing: mangoes. Summer to me means mangoes too however, in my case, I never looked forward to it.

For some strange reason, I have never enjoyed mangoes- I strongly dislike the smell and I stay away from eating it. That being said, I don’t dislike all strong smelling fruits.

One fruit that the summer brings that I most look forward to is Jackfruit.

This milder version of a Durian can stink up the entire neighbourhood if it wants to, and can be slimy, sticky and impossibly hard to eat. But one bite of its sweet, juicy flesh can have you hooked until it goes out of season.
Our garden in Kerala had a few trees that produced the most magnificent jackfruits. They were ENORMOUS and in my opinion had the juiciest flesh.

Cleaning this fruit is an arduous task that can take many hours to complete. The thick, spiny skin has to be removed in such a way that one does not come in contact with the milk that is released from the stem. This milk is very difficult to wash off and can cause an irritation to the skin. Once the tough skin is removed, the segments have to be separated. The smell of jackfruit on your hands can take days to fade off. Nevertheless, it’s a fruit that is so completely worth eating.

The best part about jackfruits, apart from its numerous health benefits, is the fact that the seeds can be consumed too. Once dry, the skins are removed and the seeds get sliced up an eaten as a snack or in curries.

I have cooked with jackfruit seeds before, tossing them with coconut in the form of a “thoran”, but this time, I made it a curry, using, as usual, coconut. XD

On to the recipes!

1. Chakkakuru Curry (Jackfruit seeds in a mildly spiced gravy with coconut)

Jackfruit seeds – 200g
Onions – 50g
Ginger Garlic paste – 5g
Freshly grated coconut – 50g
Green chillies – 2
Cumin seeds – 5g
Curry leaves – 4 or 5 leaves
Coriander powder – 5g
Cumin powder – 5g
Turmeric powder – 5g
Chilli Powder – 5g
Salt – to taste
Oil – 5ml

Method:

  • Use the jackfruit seeds about 5 days after they have been removed from the fruit.
  • Soak them in water overnight.
  • Remove the slimy skin and cut them into quarters and keep aside.
  • Finely chop the onions.
  • Grind the coconut, cumin seeds and green chillies with a splash of water into a smooth paste.
  • In a pan, heat the oil and fry the onions and ginger garlic paste.
  • When the onions turn translucent, add in the curry leaves, coriander, cumin, turmeric and chilli powders.
  • Fry well until the raw smell goes.
  • Add in the quartered seeds, pour in about 100ml water and allow to cook.
  • Once the seeds are cooked. (They should be soft when poked when cut into), stir in the coconut paste.
  • Mix well and bring to a boil.
  • Once boiled, simmer on low heat for 5 minutes.
  • Remove from heat.

2. Meen Varuthathu (Spicy slices of fried Black Pomfret)

An extremely easy, classic fish dish that is found all over Kerala. This dish can be made with any fish.

Black Pomfret slices – 500g
Turmeric powder – 5g
Chilli powder – 5g (can be increased if you like your food spicy)
Salt – 5g or to taste
Coconut oil for frying – 15-20ml

Method:

  • On a flat plate or dish, mix the turmeric powder, chilli powder and salt.
  • Add a few drops of water to mix into a paste.
  • Wash the fish slices and coat them in the paste.
  • Once all the slices are nicely coated, leave them to marinate for 20 minutes.
  • Heat coconut oil in a flat pan. Allow it to get hot.
  • Once the oil begins to smoke slightly, turn off the heat.
  • Immediately, add in the slices of fish, they should not touch.
  • After 30 seconds, turn on the heat.
  • This method allows the fish to crisp up well.
  • After 2 minutes, turn the slices over.

3. Moru Kootan (Yoghurt and coconut gravy with onions and raw banana)

This is a dish that was featured at the table in Thrissur many times during those summer holidays. Its my grandmothers recipe which was passed on to my mother 🙂 Although it isn’t a North Kerala dish, I was keen on learning how to make it. According to the rules of Ayurveda, this dish should not be had with any meat as it acts as a digestive cleanser and combining it with meat destroys the purpose. However, fried fish and moru kootan go really well together in terms of taste and its something most Keralites can’t resist. 🙂

Another thing I must add is that any vegetable can be used here. I used raw banana because I hadn’t cooked with it before. It goes really well with radish and colocassia.

Raw Banana – 2
Yoghurt/ Curd – 500ml
Onions – 50g
Green Chillies – 3
Ginger – 1 inch piece
Curry Leaves – 10- 12 leaves
Freshly grated coconut – 100g
Cumin Seeds – 5g
Turmeric Powder – 5g
Mustard seeds – 5g
Dry red chillies – 2
Salt – to taste
Oil – 5 ml

Method:

  • Peel the bananas and cut them into small cubes.
  • Boil the cubes in about 200ml water with a pinch of salt and a little turmeric powder.
  • Remove from heat and drain out the water when the pieces are soft.
  • Separately, whisk the curd well. Ensure it is not too thick. Dilute with some water if needed.
  • Slice the onions and ginger. Slit the chillies lengthwise.
  • Grind the coconut, cumin seeds and 1 chilli to a fine paste.
  • Stir the onions, ginger, two of the chillies, half the curry leaves and a pinch of turmeric into the curd.
  • Bring this mix to a boil, stirring constantly to keep it from splitting. Once boiled, turn the flame down and simmer for 5- 10 minutes, stirring occasionally.
  • When the onions are transparent, add in the cooked raw banana and the coconut paste.
  • Stir well and cook for another 3 minutes.
  • Remove from heat.
  • In a small pan, heat oil and toss in the mustard seeds. Allow them to pop. Then add in the red chillies and curry leaves. After 1 minute, remove the ingredients from the oil and pour it over the curd gravy.

Week 7: Classics

I attempted making Biryani this week.

My first ever attempt with no previous trials. It was more of a last minute decision.

I collected 2-3 recipes, retained the common factors and chose the rest. So, really I shouldn’t call it a Malabari Biryani; however, the essence of it is Malabari, i.e. the way it’s served and the ingredients in the masala.

After presenting it, one of the chefs told me what I did wrong and how it is prepared originally.

Here’s a little history on Biryani, especially of the Malabar kind.

Biryani travelled by land all the way from Persia to India. It’s one dish that Kerala did not receive from sea-faring visitors. Also, it was highly appreciated as it was a way to serve a complete meal in one container. Rice, meat, vegetables all in one pot. This was handy for those working in the fields.

Traditional Malabar Biryani is cooked on firewood and all the elements are made separately, coming together only in the end. The rice is cooked with whole spices such as cinnamon, cardamom and cloves. The meat (either chicken, fish or mutton) on the other hand is cooked in a spicy tomato and onion gravy rich in oil. The oil that floats to the top of the gravy is collected and poured over the rice just before serving. This flavoured oil makes the rice moist and ties it in with the meat. Of course, no Malabari meal would be complete without fried onions, cashews and raisins!

What makes Malabari Biryani different from other Biryanis is the fact that short grained rice is used. Unlike the usual Basmati rice, rice varieties like Jeerakasala and Jeerakachamba are used simply because of its abundance in the region. Also, the Biryani is served as a layered dish rather than its mixed counterparts. I used Saffron while cooking my Biryani, however, I learned later that it isn’t used traditionally.

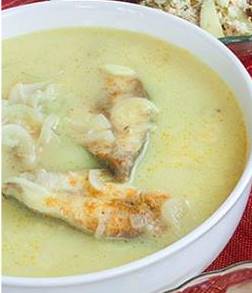
Another interesting thing I found was that this Biryani is had with a Coconut Mint Chutney. I had never heard of a Biryani with chutney before.

Malabari Biryani, Coconut Chammandi, Raita

1. Malabari/ Thalassery Biryani 

For the rice:
Jeerakasala Rice/ Jeera Rice – 500g
Cinnamon – 1 small piece
Cardamom – 3 pods
Cloves – 5 cloves
Dry Bay leaf – 1 large leaf or 2 small leaves

For the masala:
Chicken (cut into small pieces with bones) – 500g
Onions(thinly sliced) – 150g
Tomatoes(thinly sliced) – 150g
Ginger Paste – 10g
Garlic Paste – 10g
Green Chillies (slit lengthwise) – 3-4
Juice of 1 lime
Curd – 300ml
Garam Masala powder – 5g
Turmeric powder – 10g
Red Chilli powder – 10g
Black Pepper powder – 5g
Coriander powder – 10g
Mace – 5g
Caraway seeds – 5g
Coriander leaves – a small bunch
Mint leaves – a small bunch
Salt to taste

For the garnish:
Onions(thinly sliced) – 150g
Cashew nuts – 20g
Raisins – 20g

Ghee/ Clarified Butter – 50g
Coconut Oil – 50ml

Method:

  • Wash the rice and soak in water for 30 minutes.
  • Drain the water completely and spread out the rice on a flat surface. Allow to dry.
    For the garnish:
  • In a frying pan heat some of the ghee and oil.
  • Once hot, toss in the sliced onions for the garnish.
  • Fry until golden brown and crisp.
  • Remove when crisp and leave to drain on a paper towel.
  • In the same oil, fry the cashews and raisins until golden brown. (The raisins will swell slightly).
  • Remove from heat.
    For the rice:
  • Transfer this oil to a large pot. Add a little more ghee and oil.
  • In another pot, boil water equal to twice the amount of rice. In this case, 1000ml.
  • In the pot with the oil, fry the cinnamon, cloves, cardamom and bay leaves.
  • To this, add the dried rice.
  • Fry until you hear a crackling sound.
  • Once this sound is heard, pour in the boiling water.
  • Add salt (about 5g)
  • Allow to cook till the rice is nearly done and most of the water has evaporated.
    For the masala:
  • Prepare the chicken by washing it well.
  • Marinate the chicken in the curd, salt, chilli powder, turmeric and some of the coriander powder
  • In a kadai or a wok, heat oil.
  • Fry onions, garlic paste, ginger paste and green chillies
  • When the onions are softened and translucent, add in the tomatoes.
  • To this, add the garam masala powder, coriander powder, turmeric, chilli powder, black pepper, mace, caraway seeds.
  • Fry well until the raw smell of the spices goes.
  • Then add in the chicken along with the marinade.
  • Fry well.
  • When the chicken is half cooked, add the juice of the lime and season with salt.
  • Cook until the chicken cooks through and a layer of oil forms at the top.
  • Collect the oil off the top and store it separately.
  • Once the liquid has reduced to a thick paste, add in the chopped mint and coriander. Cook for another minute and turn off the flame.
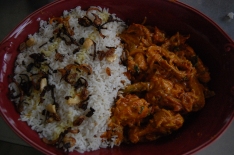
To assemble:

  • Lay out all of the meat gravy on the bottom of the dish.
  • Spread the rice over the meat.
  • Garnish with fried onions, cashews and raisins.
  • Drizzle the oil collected from the gravy over the rice.

This is what it looked like half way through:

DSC_0608DSC_0612


2. Thenga Chammandi

Freshly grated coconut – 50g
Mint leaves – a small bunch (25g)DSC_0621
Coriander leaves – 5g
Ginger – 1 small piece
Garlic – 2 cloves
Juice of half a lime

Method:

  • Grate coconut
  • Wash and remove stalks of mint and coriander
  • Peel the ginger ad roughly chop it
  • Combine all ingredients together and blend with a splash of water.
  • It should form a thick paste.

3. Raita:

Curd/Yoghurt – 500ml
Onions – 150g
Tomatoes – 150g
Mint leaves – a small bunch
Salt to taste

Method:

  • Roughly chop the onions.
  • Roughly chop the tomatoes and remove the seeds.
  • Clean and pluck the leaves of the mint.
  • Combine all the ingredients with the curd.
  • Season with salt.
  • Mix well.

Week 6: New Years in July.

This week, I decided to cook some of my own personal favourites.

This rice and gravy combination is cooked by my mother every Vishu and is something that most other Malayalis haven’t heard of.

A bit about Vishu:

Vishu is a Hindu festival that’s celebrated around the second week of April every year. It is considered as the first day of the new year in Hindu Calendars. It is also around the harvest season and so food plays a very important role on this day.

I both love and dislike Vishu. However, the likes outweigh the dislikes. Here’s why:

– I love Vishu because of the massive vegetarian spread for lunch.
– I also love Vishu because this is one day where all the elders in the family give the young ones money 😉
– I dislike Vishu because I am woken up before the break of dawn
– However, I still like it because once I’m woken up, I’m led with my eyes closed to a lamp that is lit in front of a mirror. This mirror is surrounded by the fruits and vegetables that are harvested at that time. Also, there are flowers and small items of gold. The idea is that the first thing one should see on waking up in the new year is oneself surrounded by prosperity and wealth. It is supposed to ensure that one has a good year. 🙂

Anyway, getting back to the food.

No Vishu in my house is complete without two simple dishes made by mum: Vishu Katta and Velarika Ishtu. The second is a name we recently gave the dish. Until then, it was referred to as Cashew curry. Since Vishu is a vegetarian day in our households, no meat is consumed in any form. This week, however, I teamed the two dishes with a roughly ground chutney made with dried prawns.

Week 6

Note: In two of the recipes, I use freshly extracted coconut milk. To get enough coconut milk for both the recipes, use 2 – 3 coconuts.

Fresh Coconut Milk

Coconut – 2 or 3
Water – 450ml

  • Grate the coconuts
  • Boil 1 cup (150ml) of water. Once boiled, pour the water over the grated coconut. Allow it to soak for 5 minutes.
  • After soaking, squeeze the coconut to release the first extract of coconut milk. Keep it aside.
  • Boil another cup of water and repeat the process. This will give you the second extract which will be much thinner.
  • Repeat the process again with another cup of water to collect the third extract. This one will be the thinnest in consistency.

1. Vishu Katta (Savoury rice and coconut milk cake)

This dish uses three different presses of coconut milk. A slight hint of roasted cumin seeds gives this rich dish an extra edge.

Rice – 500g
Fresh Coconut Milk – 100ml of first extract, 100ml of second extract and 150 ml of third extract.
Cumin Seeds – 5g
Salt – to taste

Method:

  • Wash the rice well and leave it to soak in water for 30 minutes.
  • Drain the water from the rice.
  • In a large pot, boil the 3rd extract of coconut milk along with 1 cup of water.
  • When it comes to a boil, add the rice.
  • After it bubbles a little, stir in the 2nd extract of coconut milk.
  • Season with salt and allow it to cook through.
  • If it begins to dry out, add a little water.
  • Separately, heat a small frying pan and roast the cumin seeds.
  • Once the aroma is released, take it off the heat, cool it down and grind it slightly. It should not be too powdery.
  • The rice should be overcooked and slightly mushy. Once it reaches this texture, add in the first extract of coconut milk.
  • Cook for another minute; stir in the cumin seeds.
  • Remove from heat and pour onto a flat dish.
  • Flatten with a spoon so it is evenly spread out and leave it to cool.
  • When it cools it will solidify like a cake. It can then be cut into squares.

2. Velarika Ishtu (Cooking cucumber and cashew nuts in a coconut milk stew)

Cooking Cucumber or White Pumpkin – 250g
Ginger – 10g
Green Chillies – 10g
Cashew nuts – 25g
Coconut Milk – 200ml 3rd extract, 100ml 1st extract
Curry leaves – 4-5 leaves
Salt – to taste

Method:

  • Thinly slice the cooking cucumber or white pumpkin.
  • Finely chop the ginger and slit the chillies lengthwise.
  • Split the cashews into two.
  • In a pot, combine the 3rd extract of coconut milk with the ginger, chillies, curry leaves and cucumber slices.
  • Cook it on high heat until the liquid boils. Bring to a simmer and allow the cucumber to cook to about 70% (it should be soft in the centre and still a little hard on the sides)
  • At this point, stir in the cashew nuts.
  • When the cucumber is completely soft, season with salt and pour in the 1st extract of coconut milk.
  • Stir well and remove from heat after a minute.
  • This gravy is poured over the Vishu Katta.

3. Chemmeen Chammandi 

DSC_0376

Dried Prawns – 50g
Freshly grated Coconut – 50g
Dry red chillies – 3
Sambar/Pearl Onions/Shallots – 5
Ginger – 5g
Curry leaves – 4-5

Method:

  • Clean the onions, remove the skin and roughly chop them
  • Peel the skin off the ginger and roughly chop it.
  • Break the chillies into smaller pieces.
  • Heat up a frying pan and toss in the onions, ginger, curry leaves and red chillies.
  • Toss on a medium flame lightly until a nice smell emanates.
  • Add in the prawns and toss for about 15 seconds.
  • Finally, add in the coconut and toss well until it turns light brown.
  • Remove from the heat and allow it to cool.
  • Once cooled, gently pound with a mortar and pestle or in a mixer.
  • It should not be a very fine paste.
  • Enjoy as an accompaniment for rice dishes.

Week 5: Moplah Cuisine

In this week, I decided to be a little more adventurous. I didn’t take recipes from my mother or my grandmother. Instead, I scoured the internet for something I tasted in Calicut over the summer.

At the start of this years summer, the family drove down to Calicut for a wedding. It was my first time there and so I was quite excited about trying the food there. I will get to my Malabar Biryani experience later but first, let me talk about the street food.

One scorching afternoon, we walked out of our hotel in search of a good cup of chai. Why anyone would want to drink hot, sweet tea in such heat befuddles me but we fell into that category anyway. My dad took us to a tiny, blue hole in the wall with a glass cabinet stuffed with golden brown goodness.

Every shelf had 3 different types of deep fried snacks. This shop didn’t need to advertise. The sheen of deep-fried gold was enough to draw us and everyone else in. Next to the cabinet was a counter from which you could ask for tea- regular or Sulemani (Arabic lemon tea). The availability of Sulemani chai at every single eating establishment in Calicut is due to the Muslim population in that region. The largest Islamic group in the Malabar region is that of the Mappilas or Moplahs. Their cuisine, which is influenced by the Arabs- is richer than regular Kerala cuisine, with more of an emphasis on meat and eggs.

This little tea stall served Moplah snacks that are not found in any other parts of Kerala, especially the South. The most interesting one was something called “Chatti Mutta Pathiri”. This was a multi-layered snack made from flour and eggs and was mildly sweet. It strongly resembled Bebinca from Goa, the main difference being that this was fried.

Another snack that I enjoyed was the “Ney Pathiri”. Regular “pathiris”, or the ones I was used to are thin rice based flatbreads. This version is deep fried and has a soft, leavened and spongy texture.

That is what I attempted to cook in this class.

Neypathiri Chicken curry

1. Ney Pathiri

Rice Flour – 500g
Grated Coconut – 250g
Cumin Seeds – 10g
Shallots/ Pearl Onions – 4-5
Ghee – 5g
Salt – to taste
Coconut Oil – for frying
Water – 250ml

Method:

  • In a large pot, heat ghee. When hot, pour in the water.
  • When the water begins to boil, stir in the rice flour. Cook for about 5-7 minutes. Remove from heat and sprinkle salt.
  • Separately, coarsely grind the coconut, cumin and pearl onions.
  • Add this mixture to the flour. Knead to a smooth dough.
  • Roll out into lime-sized balls.
  • Flatten them between your palms and roll out flat.
  • Heat enough oil for deep frying.
  • Drop the pathiris one by one into the oil when hot enough. Deep fry till they are golden brown.
  • Eat with chicken or mutton curry.

2. Nadan Kozhi Curry

Chicken – 500g
Onion – 100g
Green Chillies – 3, split lenghwise.
Garlic – 7g
Ginger -7g
Tomatoes – 50g
Red chilli powder -5g
Coriander powdered – 5g
Turmeric powder – 5g
Grated coconut – 125g
Fennel seeds – 2.5g
Cardamom – 1 pod
Cloves – 3
Cinnamon = 2 pieces
Shallots/ Pearl Onions
Coconut Oil – 10g
Curry Leaves – 4-5
Salt – to taste.

Method:

  • Dry roast the ingredients and grind to a paste.
  • Heat oil in a pan. Saute chopped onions and green chillies, ginger and garlic.
  • Add turmeric, coriander and chilli powder. Saute well until the raw smell goes.
  • Add in finely chopped tomatoes.
  • Cover and allow to cook till the tomatoes are done.
  • Add in the chicken pieces, 1/2 cup water and stir well. Cover till the chicken is cooked.
  • Finally, add in the group paste and curry leaves. Allow it to cook for 3-4 minutes.
  • Serve with Ney Pathiri.

3. Pazham Porichathu

Nendra Banana –
Sugar – 10g
Ghee – 10g

Method:

  • Thinly slice the bananas
  • Heat ghee
  • When hot, shallow fry the bananas and sprinkle with sugar.


Week 4: Amaranth Leaves

This week, I decided to cook with “Cheera”. Small, slightly bitter leaves that resemble and are often referred to as Red Spinach. These leaves, tossed with fresh coconut and just a little bit of chopped onions form a delicious accompaniment to meals heavy in meat. They cook in minutes but are a challenge to clean as they seem to come straight from the ground with mud and all.

I found myself struggling to find out what these leaves are called in English. I knew it was “keerai” in Tamil, and “saag” in Hindi. Also, I was sure Red Spinach wasn’t the only name. I then hit another wall when I was asked for the name of this specific leaf- small green leaves that were red in the centre. The question was passed around to different people when finally one of them said “Araikeerai”. It was Tamil but at least it’s something to go by.

I immediately looked it up on reaching home.

Amaranth or Edible Amaranth is popular all across South , South East Asia and Africa. It’s especially common in Cambodia and Uganda. And I also discovered that in Nagaland, it’s eaten with potatoes. Yum!

So, without further ado, this is how I cooked Cheera this week:

1. Cheera Thoran (Amaranth leaves tossed in fresh coconut)

Cheera Thoran


Amaranth leaves(either red or green) – 500g
Coconut (freshly grated) – 100g
Onions – 100g chopped fine
Ginger paste – 5g
Green chillies – 1-2 slit lengthwise
Curry leaves – 4-5 leaves
Mustard seeds – 5g
Turmeric powder – 5g
Chilli powder – 5g
Salt – to taste
Oil – 5ml

Method:

  • Remove the Amaranth leaves from the stalks and wash thoroughly until all the sand is removed.
  • Finely chop the onions and slit the chillies lengthwise
  • Drain all the water from the leaves in a colander.
  • Heat oil in a large frying pan.
  • Add in the mustard seeds and allow them to splutter for a minute.
  • Add in the onions, ginger paste, chillies and curry leaves.
  • Fry till the onions become translucent.
  • Add in the turmeric and chilli powder. Fry for 30 seconds.
  • Add in the leaves and stir well till the leaves begin to wither.
  • Season with salt.
  • Once the majority of the liquid from the leaves has dried up, add in the coconut. Mix well. Cook for another minute.
  • Remove from heat.

2. Kappa Puzhukku (Mildly spiced soft tapioca with mackerel flakes and coconut)

A friend commented saying that this dish looked like Shepherds Pie. It then hit me that this really is a Malayali take on “meat and potatoes”. Instead of beef, I used fish; and instead of potatoes, I used tapioca!

Tapioca – 500g (Raw Malabar bananas can also be used instead)
Mackerel – 500g
Coconut (freshly grated) – 200g
Onion – 100g
Green chillies – 3
Cumin seeds – 5g
Garlic – 4-5 cloves
Curry leaves – 4-5 leaves
Turmeric powder – 5g
Salt – to taste

Method:

  • Clean the fish and remove the heads.
  • Remove the skin from the tapioca. Lodge your knife into the skin and turn it left sharply. This should pull the thick skin away.
  • Cut the tapioca into cubes, approximately 1inch x 1inch.
  • Roughly chop the onions.
  • Combine the onions with the coconut, chillies, garlic, cumin seeds and chilli powder. Blend in a mixer until it is roughly ground. (10-15 seconds). Keep aside.
  • Place the tapioca in a saucepan with water covering it. Add in a pinch of salt, turmeric powder and curry leaves.
  • Bring to a boil and then simmer for another 10 minutes.
  • Check the tapioca to see if it is soft. Remove from heat only when soft,
  • Retain some of the water.
  • Put it back on the flame and add the onion, coconut mixture. Cook for a couple of minutes.
  • In another saucepan, boil some water. Once it boils, bring to a simmer and place the fish in it.
  • Allow to cook for 5 minutes. Remove only when the meat is cooked through.
  • Remove from the water.
  • Remove the skin and the bones from the fish. Flake the meat with a fork.
  • Add the fish flakes to the tapioca mixture. Mix well and cook for another 5-7 minutes.
  • Remove from heat and mash the mixture well. Add curry leaves in the end.

3. Erachi Varathuarachathu (Mutton cooked in a dark gravy of roasted coconut and spices)

Erachi Varathuarachathu


Mutton – 500g (small pieces with bones)
Potatoes (optional)
Onions – 100g
Ginger paste – 5g
Garlic paste – 5g
Cloves – 3-4
Cinnamon – 1 small piece
Bay leaf(dried) – 1 leaf
Green chillies – 1 slit lengthwise
Curry leaves – 4-5 leaves
Coriander powder – 5g
Cumin powder – 5g
Turmeric powder – 5g
Chilli powder – 5g
Salt – to taste
Oil – 15ml

For the masala:
Coconut (freshly grated) – 50g
Black peppercorns – 15g
Dry red chillies – 3
Coriander seeds – 15g
Cumin seeds – 15g

Method:

  • Combine all the ingredients for the masala.
  • In a small frying pan, roast the spices without any oil.
  • Once a nice smell emanates, add in the coconut.
  • Roast for another 5 minutes. Do not allow it to burn.
  • Remove from heat. Allow it to cool.
  • Once cooled, pour all the ingredients into a mixing jar with a splash of water. Grind to a rough paste. It need not be too smooth.
  • Clean the mutton pieces.
  • Thinly slice the onions.
  • Heat oil in a large pot.
  • Fry the cloves, cinnamon and bayleaf for 10 seconds.
  • Add in the onions, ginger and garlic pastes. Fry until light brown.
  • Add in the green chillies (slit lengthwise) and curry leaves.
  • Stir in the turmeric powder, chilli powder, cumin powder and coriander powder. Fry well till the raw smell goes.
  • Add in the mutton pieces and fry for 2 minutes.
  • Mix in the freshly ground masala. Fry for 3-4 minutes, stirring well.
  • At this stage, the potatoes can be added- raw and cut into large 2inch cubes.
  • Add water to cover the meat and a little more.
  • Bring to a boil and then simmer. Season with salt.
  • Allow the meat and potatoes to cook, replenishing the water if needed.
  • Check for salt.
  • Remove from heat when done.

Until next week,

– Anahita.


Week 3: Square Square

One dish that my entire family loves is what we affectionately call “Square Square”. For the longest time, I did not know what “square square” was made of. It was simply crisp cubes of umami loveliness. These tiny crunchy golden brown cubes heaped up on a plate would be devoured within minutes after they emerged from the kitchen.

So, when I sat down with my mum and grandmother one late night, we decided I would finally learn how to make this addictive dish. When I finally asked for the traditional name of the dish, the answer was a straight “square square”! After the laughs died down, I was told it was called “Chena Upperi”- translating to ‘fried yam chips with salt’. Now although it may sound like a snack, it does accompany main meals.

Chena Upperi is made from Elephant Foot Yam – a fairly unpleasant looking tuber with a thick black skin. This yam, if not cooked properly can cause a pretty severe itching irritation on the tongue. This is due to the presence of calcium oxalate.

I even find it tough to handle it with my hands for long periods of time as my fingers begin to itch too. Nevertheless, the end product is something I can really live on for the rest of my life.

Did you know it’s good for you too? The tuber is often prescribed when curing a number of illnesses : Bronchitis, asthma and dysentery to name a few.

Now lets get down to the recipes:

1. Chena Upperi (Elephant Foot Yam Chips)

Elephant Foot Yam – 500g
Turmeric powder – 5g
Chilli powder – 5g
Salt – to taste
Coconut Oil – 25ml

Method:

  • Cut off the thick skin and cut the yam into 1cm x 1cm cubes. The smaller the better.
  • Combine the turmeric, chilli powder and salt.
  • Mix the cubes in the spice mixture and leave to rest, covered for at least 1 hour. Preferably allow to marinate overnight.
  • Heat coconut oil in a large flat pan.
  • When the oil is hot, spread the cubes evenly across the surface of the pan.
  • Fry the cubes on medium heat.
  • Keep on stirring to ensure all sides get cooked.
  • Allow it to become golden brown and crisp.

I really wish I had a photograph of this!

2. Chemmeen Varuthathu (Fried Prawns in a Sweet and Spicy Tomato base)

Chemmeen Varuthathu

Prawns – 500g
Onions – 200g
Tomatoes – 200g
Garlic – 4-5 cloves
Curry leaves – 4-5 leaves
Turmeric powder – 5g
Chilli powder – 5g
Salt – to taste
Oil – 10ml

Method:

  • Remove the shells of the prawns, de-vein and clean them.
  • Finely chop the onions and tomatoes
  • Lightly crush the garlic cloves.
  • Heat oil in a flat pan.
  • Fry the garlic and onions till slightly brown.
  • Add in the chilli powder, turmeric and salt.
  • Stir in the tomatoes and cook for 1 minute, stirring well.
  • Add in the curry leaves and allow the mixture to cook through.
  • Add the prawns. Stir well.
  • Once the prawns are cooked, remove from heat.
  • Check the seasoning


3. Thovaram Parippu (Toor Dal gently cooked with Coconut and minimal spices)

Thovaram Parippu

Toor Dal – 200g
Coconut (Freshly grated) – 100g
Onions – 100g
Cumin seeds – 5g
Chilli Powder – 5g
Salt – to taste
Ghee (clarified butter) – 10g
Curry leaves – 4-5 leaves

Method:

  • Wash the dal well and soak in water for 30 minutes.
  • Finely chop half the onions. Thinly slice the remaining half.
  • Drain the water.
  • In a large pot, pour in a little more than double the amount of water to the dal.
  • Add in the soaked dal, cumin seeds, chilli powder, turmeric, a pinch of salt and the chopped onions.
  • Bring to a boil and then simmer.
  • Separately, grind the fresh coconut to a paste.
  • In a frying pan, heat the ghee.
  • Fry the onion slices in the ghee till they are crisp and golden brown.
  • When the dal is cooked, after about 30 minutes, stir in the coconut paste and curry leaves.
  • Bring to a boil.
  • When done, garnish with fried onions.

4. Nendra Pazham Madhiram (Ripe Malabar bananas and fresh coconut, flavoured with clove)

Nendra Bananas ripe – 4
Coconut (freshly grated) – 100g
Cloves – 1 piece
Sugar – 15g
Salt – a small pinch

Method:

  • Peel the ripened bananas and cut into small 1inch x 1 inch cubes
  • Put it in a pot with enough water to cover the bananas and a little more.
  • Sprinkle a small pinch of salt and the clove, broken into two pieces.
  • Turn on the flame and allow the water to boil. When boiled, bring to a simmer.
  • When the bananas are half cooked (The colour will begin to change slightly from yellow to orange and the texture on poking with a knife will be slightly soft), add in the sugar and stir once.
  • When the bananas are cooked, sprinkle the freshly grated coconut.
  • Mix well. Check for sweetness. Add some sugar if required.
  • Remove from heat, drain any excess liquid. There should only be a little water.

That’s all for now!

– Anahita.


Week 2: The other fish curry.

Each week, a few guests are invited to experience our meals. The guests are usually top personalities from the food and beverage industry in Bangalore and India.
This week, one of our guests mentioned that he would be keen on seeing us move away from our comfort zones and cook outside of our mother cuisine.
The irony of it all is that this very exercise of sticking to our mother cuisine has put most of us out of our comfort zones!
At the drop of a hat, I’d cook a stir fry or bake some cupcakes.
As surprising as it may sound, Kerala cuisine is FAR from my comfort zone.
Both my parents grew up outside of Kerala and so my home cuisine has consisted of Tamilian, Maharashtran, Vietnamese, Thai, and a whole lot of Pasta. Festivals, especially Malayali ones were the only times I got to experience real Kerala cuisine- except of course the monthly fish curry 🙂 (Which I can never get tired of).
And so, that’s what keeps pushing me each week- the challenge of something new, something like my own mother cuisine 😉

This is what my 4-course consisted of this Saturday:

1. Meen Moilee (Fish Curry)

Meen Moilee (Black Pomfret in a lightly spiced coconut milk gravy)

Seer Fish/ Black Pomfret/ Indian Salmon – 500g (sliced)
Onions – 200g thinly sliced
Ginger – 10g thinly sliced
Garlic – 10g thinly sliced
Coconut Milk – 200ml
Cloves – 2-3
Turmeric powder – 5g
Chilli powder – 5g
Lime – 1
Flour – 5g
Salt – to taste.
Oil – 20ml

Method:

  • Clean and slice the fish
  • Marinate the fish in turmeric, chilli powder and salt for 30-40minutes
  • Heat half the oil in a shallow pan and lightly fry the fish slices. Cook for about 3 minutes on each side.
  • Remove and keep aside.
  • In another pan, heat the remaining oil and fry the onions, ginger and garlic.
  • When the onions are light brown, add half of the coconut milk and equal parts water. (Ideally, the second extract of fresh coconut milk is used at this stage)
  • Add salt and cook on medium.
  • Mix the flour with 5ml of water to create a slurry and add it to the gravy in case it is too watery.
  • Add in the fish slices, stir very gently, making sure the fish doesn’t crumble.
  • Allow the gravy to thicken, add in the remaining coconut milk.
  • Turn off heat and squeeze half a lime into it.
  • Eaten with white bread slices.

2. Erachi Kothucurry (Minced meat fry)

Erachi Varuthathu (Mildly Spiced Minced Lamb)

Minced lamb – 500g
Onions – 200g
Tomato – 100g
Potato – 200g
Ginger -5g
Garlic – 5g
Cumin Seeds – 5g
Coriander leaves – 5g
Turmeric powder – 5g
Chilli Powder – 5g
Salt – 5g
Oil – 10ml

Method:

  • Clean the lamb mince, but ensure to retain some of the fat.
  • In a large pan, boil the mince in about 300ml water, the turmeric, chilli powder and salt.
  • Once half cooked, remove from heat and drain out the water.
  • Separately, wash and peel the potatoes and chop into tiny cubes. Boil.
  • Combine the ginger-peeled and chopped roughly, garlic and cumin seeds and roughly grind in a mixer.
  • In another frying pan, heat the oil and fry the onions. Once it begins to discolour, stir in the ground mixture. Fry well.
  • Add in the finely chopped tomatoes, season. The mixture should be wet. Add some water if required.
  • Add in the boiled mince and the boiled potatoes.
  • Pour in some water if the mix is too dry. Stir well and cook till the water is absorbed.
  • Garnish with cleaned coriander leaves.
  • [ Alternatively- the potatoes can be deep fried as cubes or batons and served alongside the mince or as a base).

3. Chakkarkuru Thoran (Jackfruit seeds)

Chakakuru (Jackfruit Seeds with Coconut)

Jackfruit seeds – 250g (dried for at least 5 days and soaked overnight before cooking)
Grated coconut – 100g
Turmeric powder – 5g
Chilli powder – 5g
Cumin seeds – 5g
Mustard Seeds – 5g
Dried red chillies – 5g/ 1 or 2
Curry leaves – a few

Method:

  • The jackfruit seeds should be allowed to dry for a minimum of 5 days and soaked in water for at least 8 hours before cooking.
  • The grey skins of the seeds are then removed and the seeds are cut into 4-6 slivers, lengthwise.
  • In approx. 100ml water, boil the seeds with turmeric, chilli powder, cumin seeds and salt.
  • When it is nearly soft in texture (on testing with a knife), drain out most of the water.
  • Add in the grated coconut. Stir well and cook for 5 minutes.
  • Make sure it does not get too dry. Splash in some water if required.
  • In a small pan, heat some oil and place the mustard seeds, red chillies and curry leaves to it. Allow it to splutter for 2 minutes.
  • Pour this mix over the seeds and coconut mixture.

4. Uluva Payasam (Fenugreek and coconut milk dessert)

Fenugreek seeds – 15g (soaked in water for 8-12 hours)
White rice – 150g
Jaggery – 100g
Coconut Milk – 200ml

Method:

  • Soak the fenugreek seeds in water overnight or for 8-12 hours.
  • Wash and soak the rice in water for 30 minutes.
  • In a large stockpot, place the drained fenugreek seeds in 300 ml water. Heat and allow to boil on a medium flame.
  • Add in the strained rice.
  • Allow the rice to overcook and become mushy.
  • Grate the jaggery, heat it in equal parts water and create a syrup. Strain to remove impurities.
  • When the rice becomes mushy, pour in the jaggery syrup.
  • Pour in the coconut milk. Stir well, check for sweetness and ensure the dish is creamy and liquid, not too thick. Add in water if required.


Week 1


Image


The results from Week 1! 

I made a 3 course meal, consisting of a total of 5 elements. 

When you ask anyone about Kannur food, the first thing that comes to mind is Neychoru and Mutton Ishtu. In other words, Rice cooked in clarified butter and mutton stew. 

You really can’t get more classic Kannur than this. 

And so, without further ado: 

1. Mutton Ishtu

Mutton – 500g
Potatoes – 500g
Onions – 250g
Ginger – 10g
Green Chillies – 10g
Cloves – 5g
Coconut Milk – 400ml
Flour – 5g
Salt – to taste
Freshly ground Black Pepper – to taste 
Oil – 10ml

Method: 

  • Clean the mutton and cut into small even sized cubes, about 3cmx3cm. Peel potatoes and cut into similar sized cubes. Peel the ginger and chop it finely along with the green chillies. Thinly slice the onions. 
  • In 200ml of the coconut milk and 100ml water, boil the mutton along with the ginger, chillies, whole cloves and salt. 
  • Add in the potato cubes. 
  • Cook on a low flame till the mutton and potatoes have cooked through. 
  • In a separate pan, fry the onion slices in some oil until slightly brown. Keep aside. 
  • When the meat is done, mix the flour with 5ml of water. Add this mixture into the stew. 
  • Bring it to a boil, reduced the heat and pour in the remaining coconut milk. 
  • Check for seasoning, sprinkle freshly ground black pepper, stir in the onions and remove from heat. 

2. Neychoru (Ghee Rice)

Jeera Sambar Rice (Very short grained white rice) – 250g
Onions – 100g
Cashew nuts (unsalted) – 25g
Raisins – 25g
Cloves – 5g
Cinnamon sticks – 5g
Salt – to taste
Sugar – 3g
Ghee (clarified butter) – 25g

Method: 

  • Wash the rice well and leave it to soak in water for 30 minutes. 
  • Thinly slice the onions. 
  • In a frying pan, heat half of the ghee and fry the cashew nuts and raisins until the cashews turn golden brown and the raisins swell up. Remove and keep aside.
  • In the same pan, fry half of the onions until golden brown. Once brown, sprinkle the sugar to boost the caramelisation of the onions. Once brown and crisp, remove and keep aside.
  • Drain the water from the rice and tie it in a muslin cloth. Hang it above a sink and allow to drip dry.
  • In the same pan, add the remaining ghee and gently fry the remaining onions. Once slightly brown, add in the cloves and cinnamon sticks.
  • Remove the rice from the cloth and stir it into the pan. Fry well until the rice achieves a brittle texture and falls heavily from a spoon. 
  • In a separate saucepan, boil 500ml of water (double the amount of the rice). 
  • Once boiled, pour it into the rice and add salt. 
  • When it begins to boil, lower the flame, cover with a lid and allow to cook through. 
  • Once done, garnish with the fried onions, cashews and raisins. 

3. Date Chutney 

Sambar onions/ shallots – 4-5 medium sized
Ginger – 10g
Peeled Garlic cloves – 10g
Seedless Dates – 50g
Dried Red Chillies – 10g
Tamarind paste – 15g
Sugar – 5g

Method:

  • Boil about 100ml of water. Divide it into two bowls. In one bowl, soak the dates and the tamarind in the other. 
  • When it cools, squeeze the tamarind to form pulp. Strain out the water. 
  • Peel and roughly chop the ginger. 
  • Roast the red chillies over a flame.
  • Combine all the ingredients when cool and grind in a blender/mixer. 
  • It should form a smooth paste. 
  • Best eaten with the ghee rice and mutton stew.

4. Prawn Puttu

Prawns – 500g
Onions – 200g
Grated Fresh Coconut – 200g
Turmeric powder – 5g
Cumin powder – 5g
Chilli powder – 5g
Curry leaves – A small handful
Salt – to taste
Oil – 10ml

Method: 

  • Remove the heads and tails from the prawns. De-vein them and rinse.
  • Finely chop the onions. Grate the coconut. 
  • Boil the prawns in about 200ml water along with the turmeric, cumin, chilli powder, salt and curry leaves.
  • Once the prawns are almost cooked, drain and retain some water. 
  • Chop the prawns or use your hands to tear the meat into tiny pieces. 
  • In a frying pan, heat the oil and fry the onions until slightly brown. 
  • Add in the prawns and the curry leaves along with a splash of the prawn stock. 
  • When half of the liquid has evaporated, stir in the coconut. 
  • Cook on a low flame for about 3 minutes, stirring well. 
  • Remove from heat.

5. Cabbage Poriyal 

Cabbage – 500g
Green Chillies – 10g
Cumin seeds – 5g
Freshly grated Coconut – 200g
Mustard Seeds – 5g
Curry Leaves – 5g
Turmeric powder – 5g
Salt – to taste.
Oil – 10ml

Method:

  • Peel off the cabbage leaves, wash well and remove the centre stalks. Roll the leaves tightly and shred into fine strips.
  • Cut the green chillies into 1 inch pieces
  • In a bowl, combine the shredded leaves with turmeric powder, salt, chillies, cumin seeds, grated coconut. 
  • Mix well by hand and leave to marinate for 20 minutes. 
  • In a large frying pan, heat the oil, add in the mustard seeds and curry leaves and allow to splutter for a minute. 
  • Add in the cabbage and cook for 5-7 minutes, stirring well. 
  • When a little water is released, it is done. Remove from heat.


That’s all for today. Enjoy! 

– Anahita 

Photo credits: Professor Sushil Dwaraknath. 


Step 2: Intro.

‘Muziris’. When my mother mentioned the name, I was immediately enamoured. What an exotic word! The word itself exuded something mysterious; something lost in time. Well, that’s exactly what it is. Muziris is the name of an ancient port in South India that was the centre for trade with the Egyptians, Greeks, Romans and Phoenicians.  Of course, one of the most important items exported from the south was black pepper. Oh what a world, where an edible spice was considered as important, if not more, than precious stones. 

Calicut Beach by Dhruvaraj S

Here is a beautiful picture of Calicut Beach by Dhruvaraj S. Use it to imagine what Muziris might have looked like in it’s time. 🙂 


‘Zamorin’. Another exotic word, refers to the title given to the Hindu rulers of the Malabar region who reigned between the 12th and 18th century AD. It was during this time that Vasco Da Gama opened his sailing route, connecting Kerala to Europe. Soon after this, the Dutch and the English also arrived in Kerala, heavily influencing the existing culture and cuisine. 


It is this very region that I am focusing my studies on. This magical land of Black Pepper.